Meal prep means preparing food ahead of when you need it. Start with the meals you will actually be home or at work to eat, then plan the cooking, containers and cold storage. A week of food can include frozen portions and a second cooking session; it does not have to mean seven days of leftovers in the fridge.
Use the planner below to turn your training and work schedule into a practical food plan. It organizes meals without setting a personal calorie or protein target.
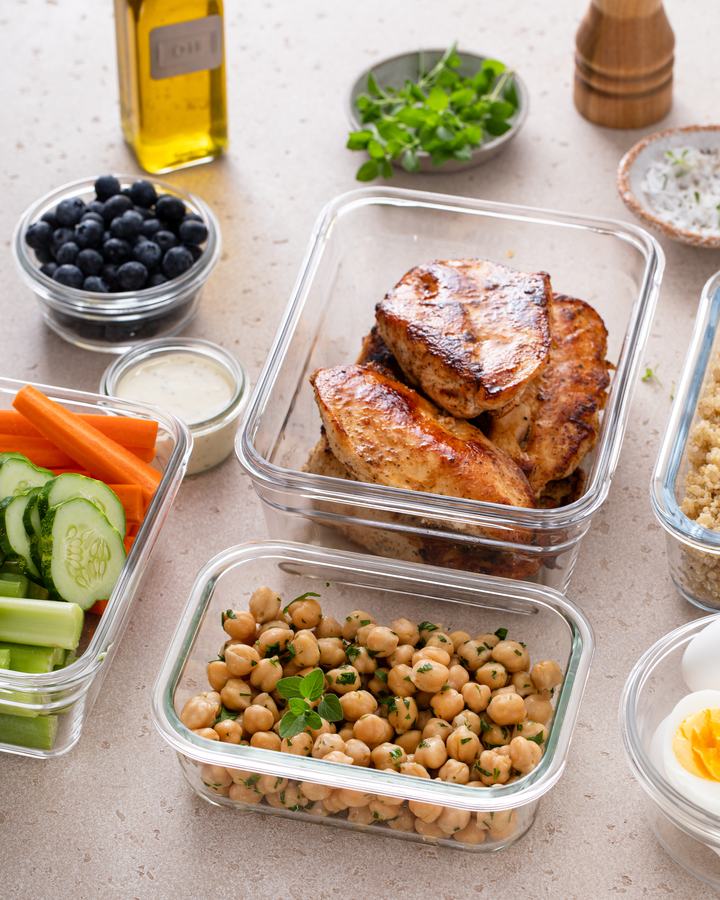
Components can become separate meals. The photograph does not establish portion sizes or nutrient amounts. Photo: fahrwasser / Envato.
How to structure your prep session
A reliable meal prep routine starts with a single high-friction meal rather than an entire week of food. Before cooking, identify the specific meal that causes nutritional or scheduling friction, define your batch size, and map out where each portion will be stored.
The 4-step prep checklist
1. Anchor your cooking window: Schedule a recurring 60- to 90-minute block (such as Sunday afternoon or Wednesday evening) when you can cook without rushing.
2. Pick one protein, one starch, and two vegetables: Preparing versatile individual components allows you to vary combinations across meals instead of eating identical containers all week.
3. Apply the 3-day refrigeration rule: Under USDA food safety guidelines, cooked meats and cooked grains keep safely in the refrigerator (at 40°F / 4°C or below) for 3 to 4 days. Mark meals intended for day 4 and beyond for immediate freezing.
4. Set a cold-chain plan: Ensure you have an insulated bag and cold packs ready for travel, and plan refrigerator thawing 24 hours ahead for frozen containers.
Choose components you will want to eat
You can prep complete dishes, separate components or just the part that takes longest. Harvard's meal-prep guide recommends starting small and building a routine around your own schedule and cooking experience. [1]
For a first batch, choose a familiar protein-containing food, a grain or starchy food and vegetables you enjoy. Decide what needs cooking and what can be assembled later. Keep a sauce or crisp topping separate if you prefer adding it at the table.
A reheatable lunch: chicken, quinoa and roasted vegetables, with dressing added after heating.
A plant-based combination: beans or lentils, baked potatoes and vegetables, adapted to a recipe you already use.
A breakfast to assemble: yogurt, oats and fruit, with the oats packed separately if you want to keep their texture.
A no-cook lunch: ready-to-eat canned beans, washed salad vegetables and bread. Follow each product's instructions after opening and keep perishable components cold.
These are combinations to adapt, rather than recipes with tested cooking times or calculated nutrients. Use a reliable recipe for the method and cooking temperature. Turn your choices into a shopping list; the healthy grocery list guide covers that next step.
Cook, cool and store with a plan
The storage numbers here follow U.S. FDA and USDA home food-safety guidance. Food-specific advice, package directions or local guidance may be stricter. Meal prep does not extend a food's safe storage time.
Prepare safely before filling containers.Keep hands, utensils and surfaces clean. Separate raw meat from ready-to-eat food, and use a food thermometer to check the safe cooking temperature for the food you are making. [2]
Divide a large batch for rapid cooling.Use small, shallow containers instead of leaving a deep pot on the counter. USDA says hot food can go directly into the refrigerator; you can also chill it rapidly in an ice or cold-water bath first. [3]
Refrigerate promptly.Refrigerate perishable leftovers within two hours of cooking or removal from hot holding, or one hour above 90°F (about 32°C). Discard food left out beyond those limits. [3]
Label the cooking date and storage destination.Keep the fridge at 40°F (4°C) or below and the freezer at 0°F (−18°C). Leave space for cold air to circulate. USDA's general refrigerator limit for leftovers is three to four days; freeze portions intended for later promptly. [2][3]
A normal smell is not a safety test.Food can contain harmful bacteria without looking or smelling spoiled. Freezing also does not make food safe after it has been mishandled. [2]
A week plan can use both the fridge and freezer
Imagine cooking four lunches on Sunday. This example puts the later lunches in the freezer during the same prep session, rather than waiting to see whether they are eaten. It illustrates storage decisions, not a tested menu or a guarantee for every food.
Original example: Sunday prep for four work lunches
Meal
During Sunday prep
Before eating
Monday lunch
Cool rapidly, cover and refrigerate promptly.
Keep cold during travel; reheat safely if serving hot.
Tuesday lunch
Refrigerate promptly with a cooking-date label.
Keep refrigerated until packing and maintain the cold chain.
Wednesday lunch
Cool rapidly and freeze promptly in a suitable container.
Allow enough time to thaw in the fridge, or reheat from frozen.
Thursday lunch
Freeze promptly and label it for Thursday.
Plan thawing ahead; do not thaw it on the counter.
Fridge thawing time varies with the food and portion. USDA also permits reheating frozen leftovers without thawing, although this takes longer. Check the temperature throughout rather than assuming a fixed microwave time will work. [3]
Work out what each container contains
If you track nutrients, calculate them from the ingredients and quantities you actually use, including sauces and cooking fats. Then account for how the batch is divided. The picture above cannot supply those numbers.
For a fictional arithmetic example, a batch containing 120 g of protein, divided into four nutritionally equal portions, gives 120 ÷ 4 = 30 g per portion. This is invented practice data, not a recipe or a suggested protein dose. Four boxes do not automatically contain equal nutrients if their ingredients differ.
For perishable food, USDA recommends an insulated lunch bag with at least two cold sources, such as a frozen gel pack and a frozen water bottle. Keep the food refrigerated until you leave and refrigerate it on arrival when possible. A container alone does not maintain a safe temperature. [4]
When reheating leftovers, bring them to 165°F (about 74°C), checked with a food thermometer. Cover and stir or rotate microwave-heated food, allow its standing time and check more than one place for cold spots. Bring soups, sauces and gravies to a rolling boil. [3]
Common meal prep questions
Can I meal prep for seven days?
You can plan seven days of meals, but USDA's general three-to-four-day refrigerator guidance for leftovers does not cover keeping the whole week's cooked food in the fridge. Freeze later portions promptly or schedule another cooking session. Follow any shorter food-specific storage instructions.
What can I meal prep that will last five days?
For a cooked batch, do not assume a five-day fridge life. Plan an early freezer portion for the later meal. Other products have their own storage instructions; a generic list of “five-day foods” cannot replace those directions.
What if I have no microwave at work?
Choose a meal intended to be eaten cold and keep its perishable ingredients cold until lunch. USDA's packed-lunch guidance includes cold chicken and pasta salads; reheating is not a substitute for maintaining the cold chain. [4]
Does meal prep automatically work for weight loss or muscle gain?
Meal prep is a way to organize food. It does not establish how much energy or protein you personally need, or guarantee a change in body weight or muscle. Keep the planning task separate from deciding your individual intake.
Sources and scope
Safety guidance was checked on October 31, 2026. The schedule, worksheet and arithmetic example were created for this guide. They are not experimental findings or tested recipes.